CONTACT form can be found at the bottom of the page

  • CONTACT form can be found at the bottom of the page

Search This Blog

August 07, 2016

CLOSED AND RELOCATED!


Hi Everyone,

For anyone that may not of noticed, my blog is now inactive. This is because my new blog is now fully operational over at www.samanthakgifts.co.uk

It doesn't quite have the same bits on it at the moment (purely due to lack of time), but you can be sure, that when I do my next lots of tutorials or 'playing' it will be posted over there :)

Thank you all for following my escapades and I hope you will join me on my new site.

Hugs,
Sam
xx

March 25, 2016

A house in the clouds...Tutorial

A house in the clouds...Tutorial
Cloud house shelf full

Happy Easter Friday :)

I hope everyone has a fab Easter weekend and don't eat to much chocolate.....not that I will be following my own advice of course hehe...

I wanted to share a recent make with you, It is a house shaped wooden shelf system and it was painted grey with clouds, as a request to match some wallpaper a customer had.

I snapped a few photos of the process to share.

Instructions:
woodhousewide empty
  1.  Take your wooden house shape shelf and paint it the base colour you want. I didn't primer this (paint with a coat of gesso or similar) I just used a couple of coats of the colour i wanted it.  I didn't have a grey paint and was worried that if I mixed my own and needed more for any reason, I wouldn't be able to get the right shade again, so I popped to my local DIY store and got a couple of tester pots in the colour that closet matched the sample paper I had been sent.

.... Please click HERE to see the rest of the blog post and instructions, over on my new blog.
Hugs,
Sam
x

March 22, 2016

Finally...My Andy Skinner workshop (CHSI) make

Wings & Heart tag grunge full frnt
Hi everyone,
I hope you are all having a great start to the week. I realised very late last night, I said I'd share my Andy Skinner workshop piece with you and I haven't!! So here it is. I will recreate this or similar very soon and post the how to on here.

andy skinner & me 2016


.... Please click HERE to see more photos, over on my new blog.
Hugs,
Sam
x

March 18, 2016

Painting the Millennium Falcon! - Dry brushing technique

mil card 4 main w
Happy Friday everyone :)
Before you get to wondering too much, i didn't need scaffolding for this job!  hehe....
Although I'm sure painting the real Millennium Falcon would be fun, this is a mini Falcon, that is made from air dry paper clay and was for use on my hubby's Valentines card.
I love paper clay, but don't use it as much as I should! Its so light weight that its perfect for adding things like this to cards and projects, without adding any weight, which means two things, my card doesn't topple over all the time and it doesn't add anything to the ever rising postage costs if I was sending it!
I just wanted to share with you how simple it is to get that old, rough, distressed kind of look (this can work on other items too, not just paper clay).
First make your object, in this case the Millennium Falcon and let it fully dry, normally over a night or two.

How to achieve the paint effect:
 Millenium Falcon 1
1. Paint your item in its base/main colour.

Millenium Falcon 2
2. Give it a second coat if need be, let it fully dry.

Millenium Falcon 3


.... Please click HERE to read the rest of this post over on my new blog.
Hugs,
Sam
x

March 17, 2016

New toy!

hand fuse

Just a little share...

I squealed when I opened the post this morning!! 
My new tool has arrived and I'm in love... I can make perfectly sealed pockets/bags and seal things away safely. As you'd guess i was sealing up everything lol.
I even had a go at sealing up irregular shapes and still loved the finish :)

pocket fuse

Oh how easily amused I am lol

Does anyone else own the wonderful We R Memory Keepers Fuse tool? If so, how do you find it? What other things do you use it for (I have so many ideas)

xx

March 11, 2016

Exploding Box Birthday card tutorial

Exploding box cake card bike ang top  Exploding box cake card bike closed ribbon tied

Morning everyone, how are you all?

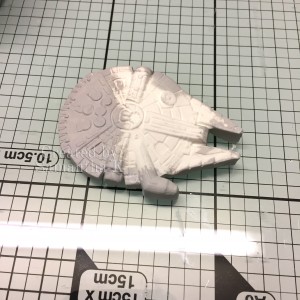
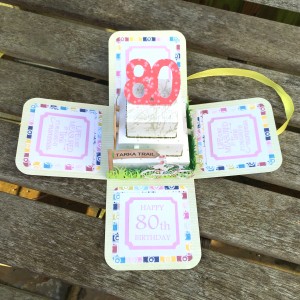
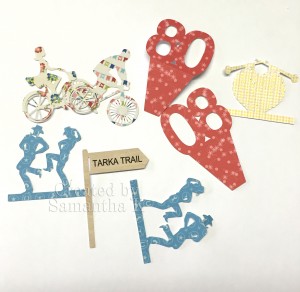
This was a recent customers order. My brief was bright, colourful, very special, she likes bike rides on the Tarka Trail, knitting and line dancing. What do you think?

I snapped some photos as I was making it, so that I could share the process with you all, so if you wanted to make your own you could give it a go :)

Making the card:
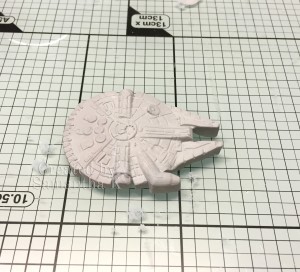
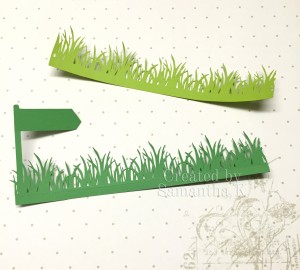
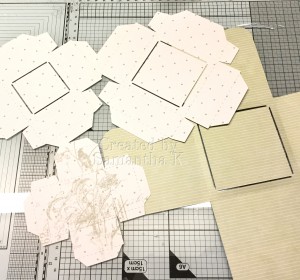
The first thing I did was get all my materials together (ingredients list at the bottom). I then cut out all of my shapes and layers. I use a mixture of hand cutting and my Silhouette cameo to do the cutting.
Grass strips

Exploding box card Grass strips

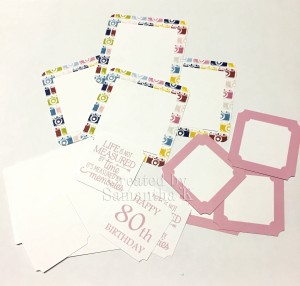
Elements that match the theme/brief.

exploding box card elements

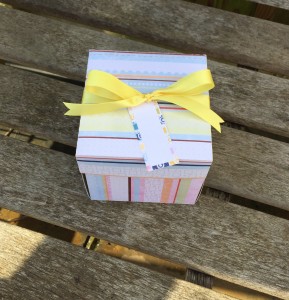
My layers, which are the base and the 3 cake sections.

exploding box card multiple sections
The panels for your side flaps.
exploding box card flap panels
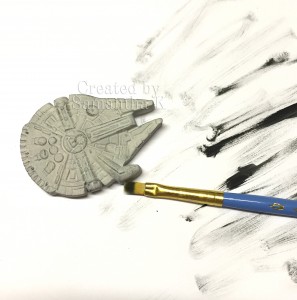
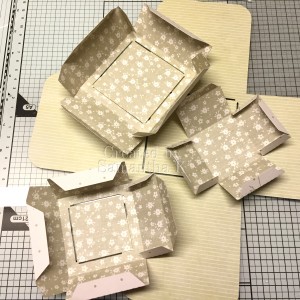
I then crease all of the sections on their perforated lines
exploding box card multiple sections creased
And then stick all edges together with a strong glue.
exploding box card multiple sections folded

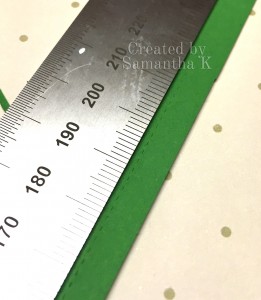
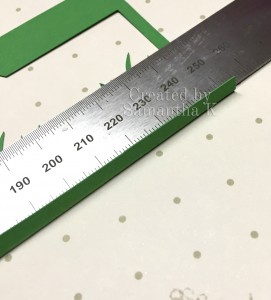
For thinner elements, where there isn't alot of card either side of the perforated strip, I use a metal ruler against the perforated line, to crease against. This is because you may end up twisting or tearing the smaller pieces otherwise.

exploding box card creasing   exploding box card creased
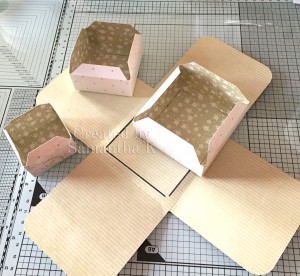
I then build up my cake tiers, starting with the top (smallest tier) you work your way down. You need to start at the top, or the flaps you need to secure will not be accessible as you work your way through. In this case I was also adding a pop up '80' onto the top tier so this was the first thing i had to do.

.... Please click HERE to read the rest of this post over on my new blog.
Hugs,
Sam
x
Related Posts Plugin for WordPress, Blogger...